How to Create your “Clickable” Gmail Email Signature
9
2021How to create your "clickable" Gmail Email Signature
STEP ONE | GO TO YOUR GMAIL ACCOUNT
Go into your Gmail account, go to settings by clicking on the gear icon on the top right, then go to all settings and scroll down until you find your email signature settings.
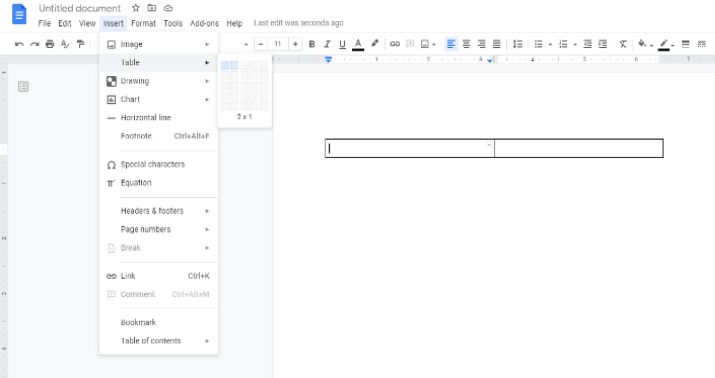
STEP TWO | OPEN UP A GOOGLE DOC AND CREATE A TABLE
- Open up a google doc, and insert a table — two columns and one row are more than enough — then pop in an image into the left-hand side.
- Download your company LOGO or HEADSHOT (small is always good because you don’t want this huge image to show up in people’s inboxes when they open your emails! Make sure to test this by sending yourself an email- that you open on your desktop and smartphone.)
- Insert the image you want to select into the table on the left. (You can adjust the size by clicking on the image. You can also right-click and crop and image if necessary.)
STEP THREE | ADD YOUR CONTACT DETAILS TO YOUR EMAIL SIGNATURE
On the right-hand side of your table, insert the details you want on your email signature:
- Your name and surname
- The name of your business
- Your position
- Phone number
- Email address (make this clickable by clicking the "link" icon in the toolbar after you highlight it
- A tagline
STEP FOUR | BASIC STYLING
You can do some limited styling to your text, choosing fonts, font colors, making the font bold, or using italics, etc.
STEP FIVE | ADD LINKS to ICONS
- First, gather the icons that you would like to use to link into your signature. Don't include an icon to something that is not professional or relevant to your business- an example would be your personal FaceBook page. If it is not business-centric, don't bother linking to it.
- Next, insert the icon by putting your cursor where you would like the icon to be placed and selecting Insert from the toolbar. You may add all the icons at one time, size them and space them out at this time.
- Next, you can add your particular relevant links by highlighting the Icon, clicking on the ‘insert’ link, copying the links you want to insert there, and clicking ‘apply’. Once you’ve done that, repeat for the other links. Clickable links, like your website, YouTube, Instagram, Linked In, or whatever is relevant for you.
STEP SIX | REMOVE THE BORDER
The last thing on styling is to remove the border around the table on your google doc. Select all the elements on your page, and find ‘border width’ or ‘border color’ on your toolbar. Make the border width zero or make the border color white, and that should remove the lines around your table. Where do you find these icons? Sometimes they are at the end, hidden by the three little dots next to ‘clear formatting’ on your toolbar.

You can find the settings to change the border color at the top right of your toolbar by clicking the three dots…
STEP SEVEN | PASTE TO YOUR EMAIL SETTINGS
Now select all of the content on your google doc and copy it. Then go over to your Gmail settings to where you located your email signature under ‘Settings’- then paste the content you copied right into that section. Make sure the styling still works. You may need to make a few tweaks to font sizing to make sure it is all neat. Then scroll down and click ‘save changes.’
STEP EIGHT | TEST OUT YOUR NEW EMAIL SIGNATURE
Create a test email to send to yourself to make sure it looks okay, and open it up so you can check that the links are all working. Check your Instagram, Facebook, Website link, or whatever other links you added to make sure they’re correct.
And that’s it! A great marketing tool that is working in the background of your business every day, allowing your customers and contacts to directly access all your valuable content and keep up with your business. Any questions? Contact us here.